I have a new fetish for knit pencil skirts. I have had a hard time finding knit that I like in my local fabric stores. I know I can order online but for some reason I like to feel it first. So, when I saw these knit tank tops at my local Walmart for $3.88, I knew I could make them into a new, cheap, cute skirt.
1. Buy a tank at Walmart. There are tons to choose from and different colors and patterns. I bought the XL because I wanted the length but you can buy whatever you think.
2. Cut the top of the tank off. Stay as close as you can so you can keep as much length.
3. I brought my sides in a little to square it up, and give it more of the pencil look. I serged mine but you can sew and then zigzag if you don't have a serger.
4. I serged across the top to give it a finished look, but you could once again zigzag.
5. I then turned up my stitch length
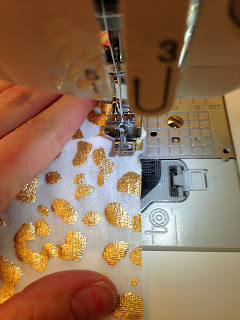
6. I sewed across the top to gather it just a bit.
7. I measured my waste and cut my elastic for my waste band. I used 2 inch elastic. Sew the ends together.
8. Pin the waste band inside the skirt with the right sides together.
9. There you have it! A new, cheap, easy skirt!!!
Wednesday, April 2, 2014
Monday, March 24, 2014
Missionary Monday
I have a little brother that is serving a mission for the Church of Jesus Christ of Latter Day Saints or LDS Church in Brazil. My mom recently found out about this cool device that missionaries can use to write on at night or during their journal time. They can write and save their journal or letters to their parents. Then when they sit at the computer all they have to do is connect it to the computer and press send and everything that they have written that week will upload into an email. This way they don't have to remember what happened that week or spend all their computer time writing. It can all be sent in one click. For those interested it is called the AlphaSmart 3000. They are pretty old fashioned so you can only buy them used on eBay, but what a great idea for missionaries.
Teacher Appreciation Gift Idea
It is teacher appreciation week this week at my children's school. I like to get the teachers gift cards so that they can go out and get something they want or need or do something nice for themselves. I was trying to come up with a creative way to give the gift card, besides the lame old plain card and I came up with the following simple and inexpensive idea.
1. Buy the ABC's Magnetic Letters. I got mine for $1 at Walmart and they were located in the toys dollar section.
2. Get a mason jar and place the gift card in first.
3. Place the magnetic letters around the gift card.
4. I took some scrap fabric and hot glued it to the mason jar lid, but paper or whatever you have on hand will work.
5. Tie a cute bow around the neck of the jar and there you have it!
Sunday, March 23, 2014
50 Mother's Day Ideas
I always have a hard time thinking of ideas for my mom and mother-in-law for gifts for Mother's Day. I decided to compile some of my top fairly affordable ideas for Mother's Day Gifts.
1. Photo Book
2. Instagram Book
3. Apron
4. Family Pictures
5. Personalized Mouse Pad
6. Exercise Shirt
7. Cardigan
8. Jewelry
9. Scarf
10. Homemade Cards
11. Grandma Children's Book-personalized with kids notes
12. Skirt
13. Picture Frame
14. Homemade Calendar
15. Complied Favorite Recipe Book
16. Pedicure/Manicure
17. Potable Flowers
18. Garden Vegetables
19. Massage
20. Book
21. Makeup
22. Flower Arrangement
23. Gas Station Gift Card---For their diet coke run
24. Chocolate or Favorite Treat
25. Personal Coupon Book
26. Spa Giftcard
27. Planned Datenight
28. Phone Case
29. Wallet or Purse
30. Sam's Club or Costco Membership
31. Return Address Personalized Stamp
32. Fabric Store Giftcard
33. Keychain
34. Movie Tickets
35. Music Mix
36. Artwork
37. DVD-Favorite Movie
38. Home Decoration
39. Favorite Hobby Supplies
40. Blouse
41. Quilt or Blanket
42. Stationary
43. Hair Product
43. Lotion
44. Candle
45. Personalized Pillowcase
46. Fruit Basket
47. Shoes....Fun New Flip Flops
48. Nail Polish
49. Decorative Pillow
50. Personal Meaningful Letter
Tuesday, March 18, 2014
Knot Headband Tutorial
I fell in love with these knot headbands as soon as I saw them.
Here is how to make them:
1. Pick out your knit fabric, these headbands are the perfect thing to make with your knit scraps.
2. Make sure your stretch in the knit is going the right way, so that it will stretch on the baby/childs head.
3. Cut out your fabric. For my one year old cutie I cut out 22 inches by 4 inches, but you can adjust accordingly for your child.
4. Sew this strip down the long side, with the right sides of the fabric together. You can serge the edge if you have a serger, but if not you can just zigzag along the edge when you are finished.
5. Flip it inside itself so that the fabric is the correct way, and iron flat.
6. Round the edges of the fabric by cutting like this:
7. Line up the other side and cut so that they match.
8. Tie a knot in the fabric and there you have it! You have made a darling knot headband! Easy as that!
Subscribe to:
Posts (Atom)